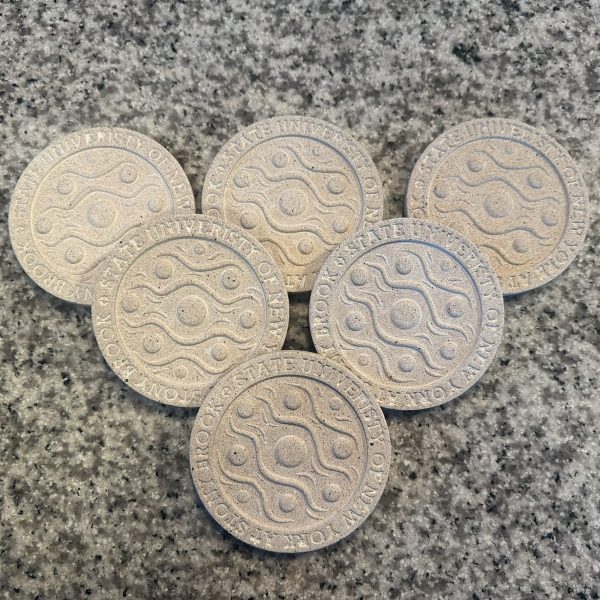
Stones-In-Brook Coasters
Project Timespan
April to June 2026 and revisited July 2026
Inspiration
Every year, as spring transitions to summer, another batch of residents graduates from the program. I have now seen three such classes come and go. It has become an informal tradition of mine to “see them off” with a 5th-year present, complete with a label ostensibly from the Stony Brook Orthopaedics Department. In a way, this Clog admits my duplicity, but I don’t think anyone would take offense at making a few little presents pro bono for my fellow residents.
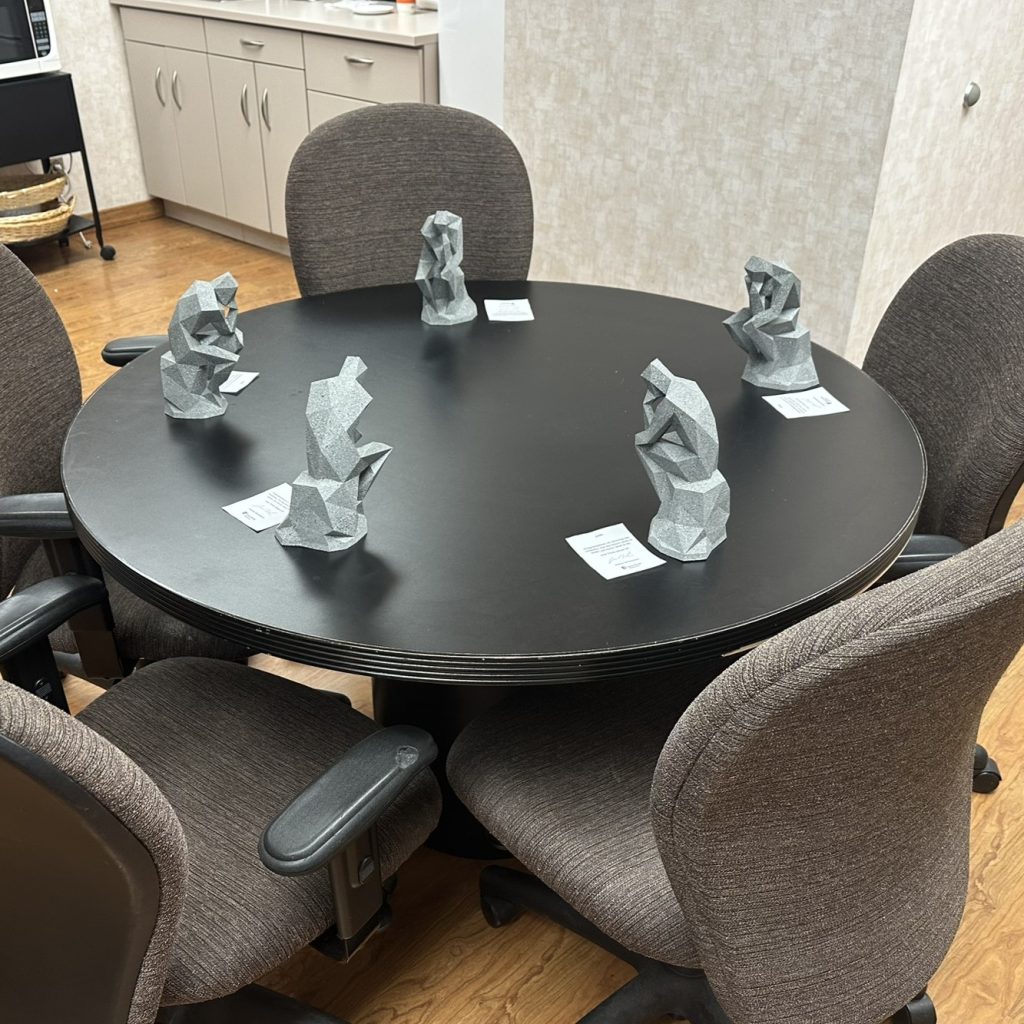
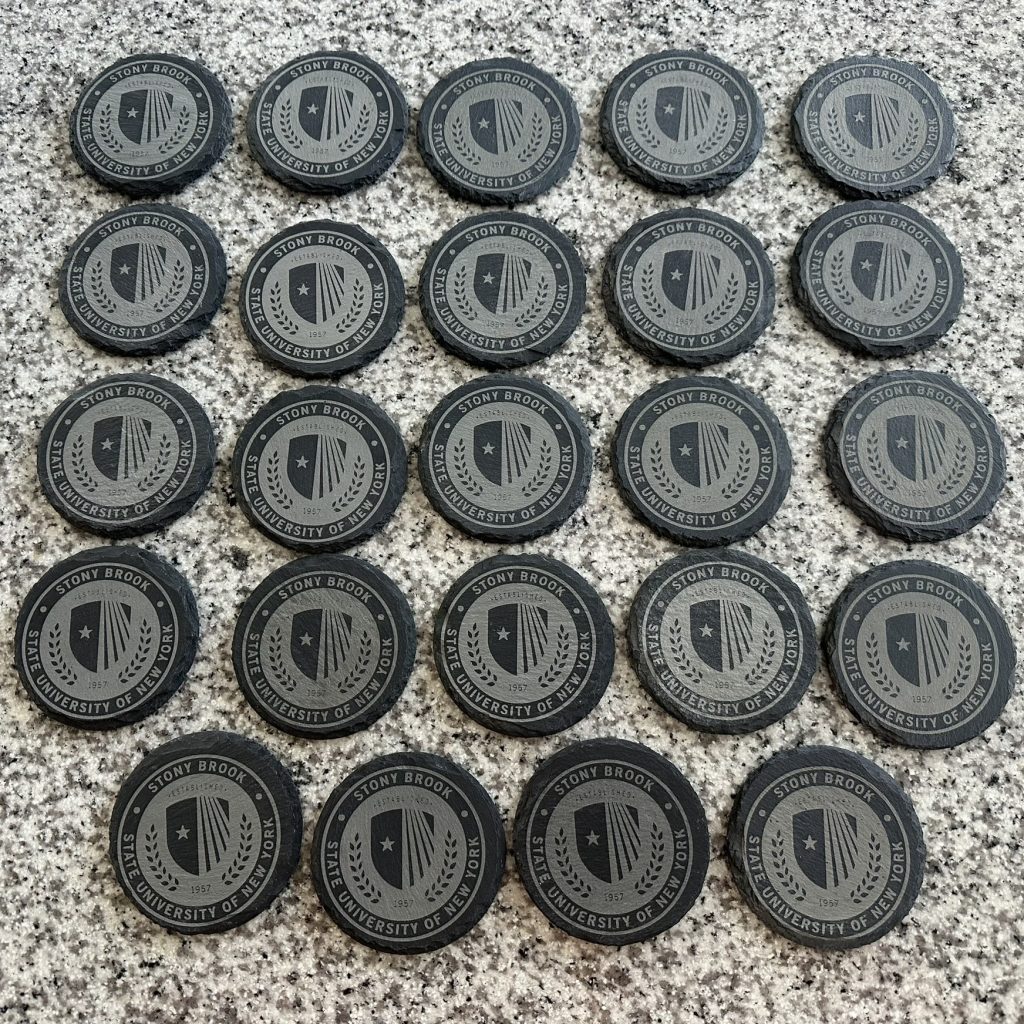
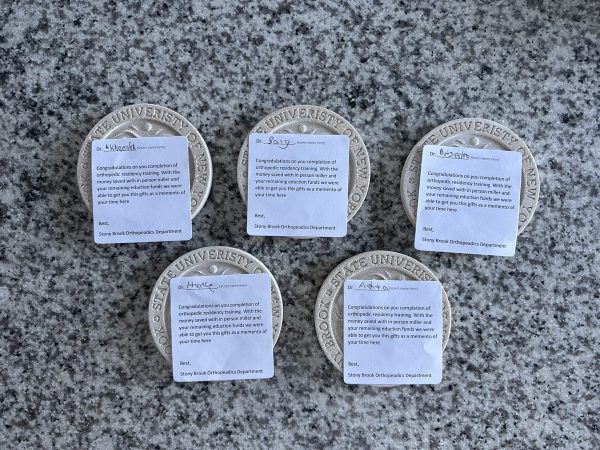
For the 2024 class, I 3D-printed enlarged low-poly Thinker sculptures and then spray-painted them with a textured stone spray. For the 2025 class, I had the local library laser-engrave a set of slate coasters. Each, of course, was accompanied by a small written note of congratulations from the department, filled with misspellings for extra fun.
Thinking ahead to this year’s class, I had another idea in mind – coasters yet again, but this time of a different design.
As an aside, I have dabbled in many coaster projects, including a set of wedding coasters, a collection of CNC-engraved wooden coasters, yet more CNC-engraved coasters, and pyrographed coasters. What’s one more to add to the list?
Project Overview and Background
Stony Brook was founded in 1957 as the State University College on Long Island. In 1962, the campus was moved to Stony Brook with a corresponding name change. The hamlet of Stony Brook has been named as such since the late 17th century, with the previous name of Wopowog (from the Wangunk Algonquian language) meaning “land at the narrows.”
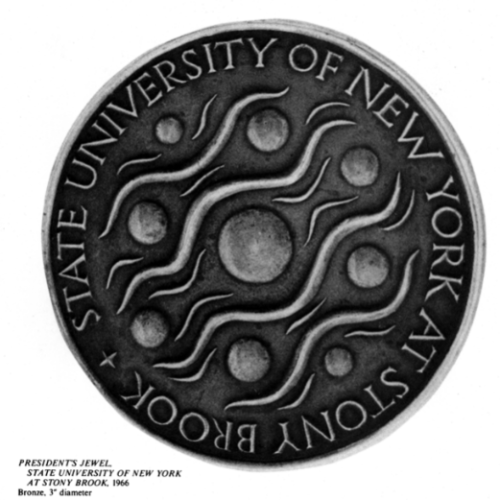
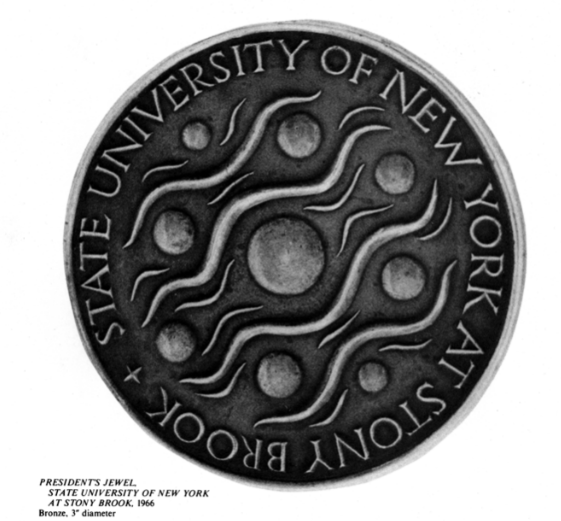
A few years back, I stumbled upon a weblink on the Stony Brook University website that details the logo history. What caught my eye was a design by Robert White, a local sculptor who for many years served as a professor of art at Stony Brook.
The design he made, referred to informally as “Stones-in-Brook,” was used as the university logo for a quarter century until 1990. In addition, it was casted into bronze for use as the Stony Brook Medal – an award bestowed upon those with “significant and lasting impact on the university“, though it appears they have moved past from the design in recent years.
The simplicity is what most appeals to me about the design, with its small undulating ripples amidst circular stepping stones. My goal then was to recreate this in coaster form.
Project Workflow
While the gray-tone image would lend itself well to slate laser-etched coasters, I wanted to add three-dimensional depth to the project.
This was my plan: I would first convert the image into a three-dimensional design using Fusion 360, a CAD software program. Next, I would 3D print the resulting design and make a silicone mold from the 3D print. Using the silicone mold, I could then cast the coaster in whatever material I wanted (provided it was compatible).
I spent a fair bit of time deciding on the ideal end material for these Stones-In-Brook coasters. One idea that came to mind was casting in metal, though I quickly deemed this impractical. For one, I do not have access to a furnace for smelting and metal casting. In addition, the process would take additional steps involving wax. I could either make the 3D mold such that it would allow for pouring of molten candle wax (which generally melts at lower temperatures than the PLA plastic), or try to cast the candle wax using a silicone mold (which likely would ruin the silicone mold itself). Afterwards, the process would be one of the lost-wax method, where an impacted sand can be used to surround the meltable wax model. The wax itself would then be heated and burnt out, and molten metal could then be poured into the resulting cavity. Too complex and impractical for now!
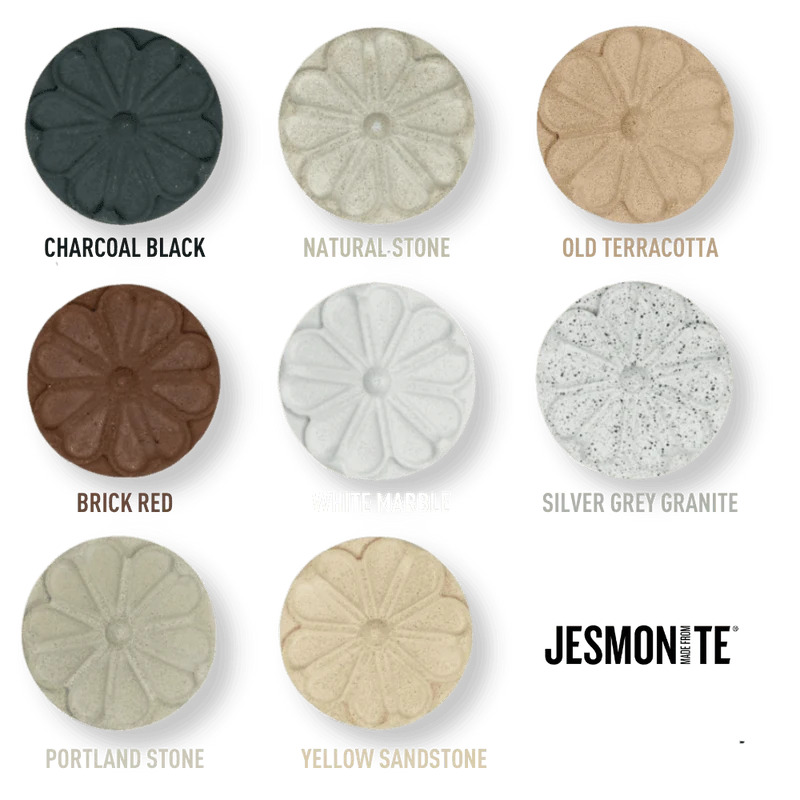
An alternative idea was to use a cement/concrete mixture for the cast. In a way, this would connect back to the name of the design itself – Stones-in-Brook – and provide a desirable heft to the finished product. I explored online for different concrete and cement mixes, came across an intriguing product called Jesmonite. This product is made from a two-part composite system that combines a reactive mineral powder with a water-based resin liquid. While Jesmonite comes in several versions, the one that I thought would be most applicable was the heavy-duty, exterior-grade product called Jesmonite AC730 which incorporated cement-based aggregates.
Materials
During the course of the project, I had access to a 3D printer and a laser cutter from the local library; the library printed in PLA filament.
2-part silicone mold-making kit
Jesmonite AC730 (both base and liquid)
Jesmonite Super Plasticiser
White vinegar
Sanding paper
Kitchen scale
Massage therapy gun
Sticky tack spray
Coaster 3D Design
The 3D design portion of the project arguably took the longest time. I had this project in mind since the first few months of residency, but it was not until a couple of years later that I finally spent the time to sit down and finialize the design.
From a coaster functionality standpoint, there is a downside to having a three-dimensional top surface. The main purpose of the coaster is to provide a buffer space for the hot/cold drink from contacting a tabletop. If the coaster did not provide a stable platform upon which the drink could sit, this would lead to inevitable spills and curses. That being said, I wanted to retain the three-dimensionality of the original sculpture.
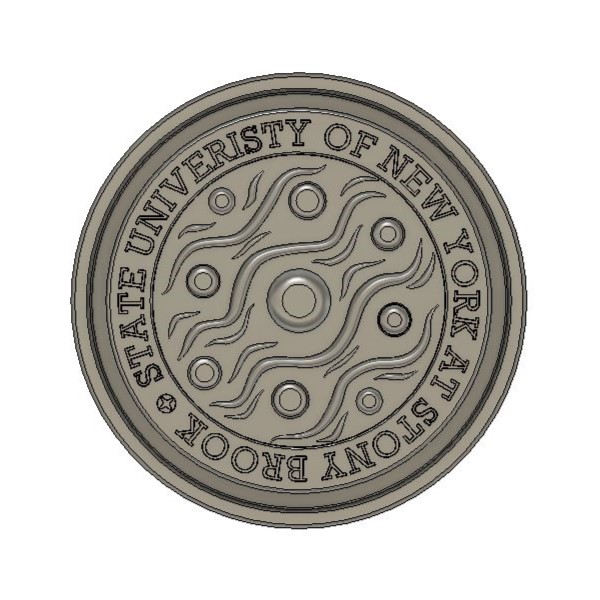
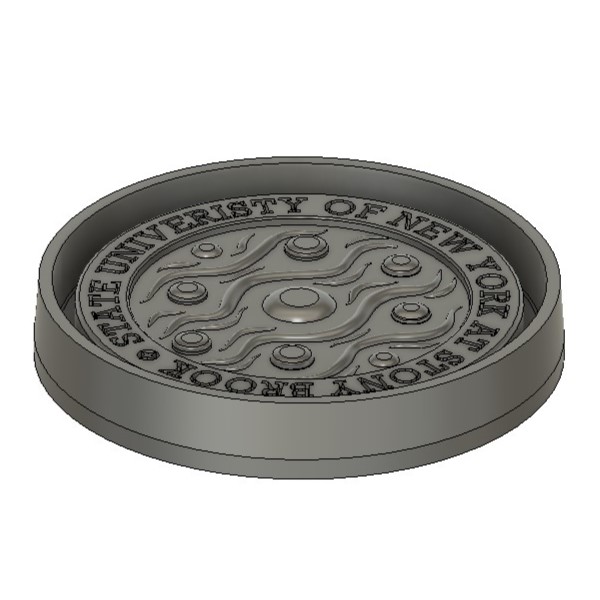
I decided on the following: Whereas it does appear that the text for the original design was raised, I instead recessed that portion of the design for both function and durability. I also changed the font as well to one that was more uniform in line thickness. The crux of the design centered on the middle portion of the posterior. I thought through different options but eventually chose to create a circular recess within the surrounding text; this would form the bottom of the brook, so to speak. Rising from this bottom would then be raised waves and the stones as well. I extruded the stone such that the medium and larger stones would be of the same height as the surrounding outer band, which would allow a cup to be supported not only along the outer band but also using the middle design itself. The waves were constructed such that they would not reach those heights and thus disrupt the balance of the cup sitting on top of the coaster.
In terms of dimensions, the coaster diameter measured 4″ (101.6 mm), and the thickness was 3/8″ (9.50 mm). Accounting for the 3 mm cork sheet that would be added at the end, the finished coaster would be about 1/2″ (12.5 mm) in thickness.
All of this sounds fine, in theory, though the process itself was considerably more time-consuming. I made sure to extrude shapes with a slight angle such that there would be no overhangs in the resultant shape. I am not sure how much of the difference this made, as the silicone itself is quite flexible and pliable.
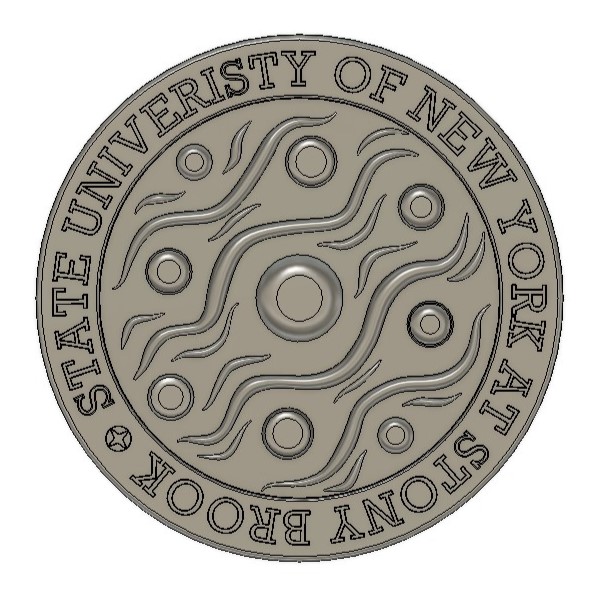
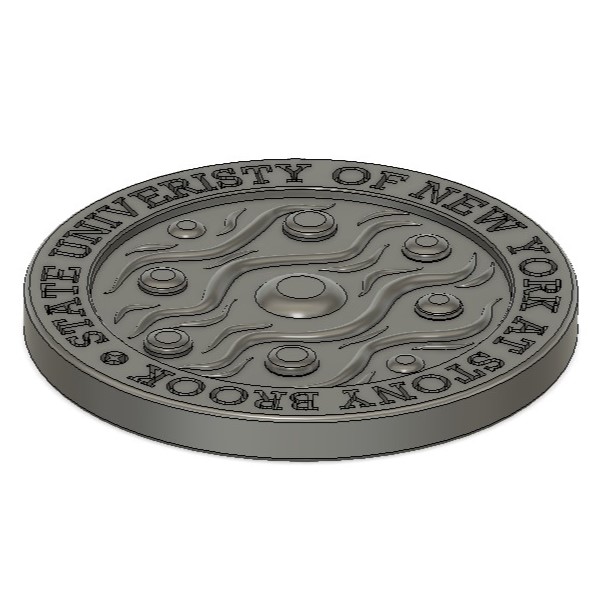
I also made sure to design the surrounding wall to allow the silicone to form a perfect mold as it was poured into the cavity. I left about 10 mm of thickness so that the resulting mold would be of sufficient strength. To limit any points of stress, I made sure to bevel sharp corners in the design.
3D Printing
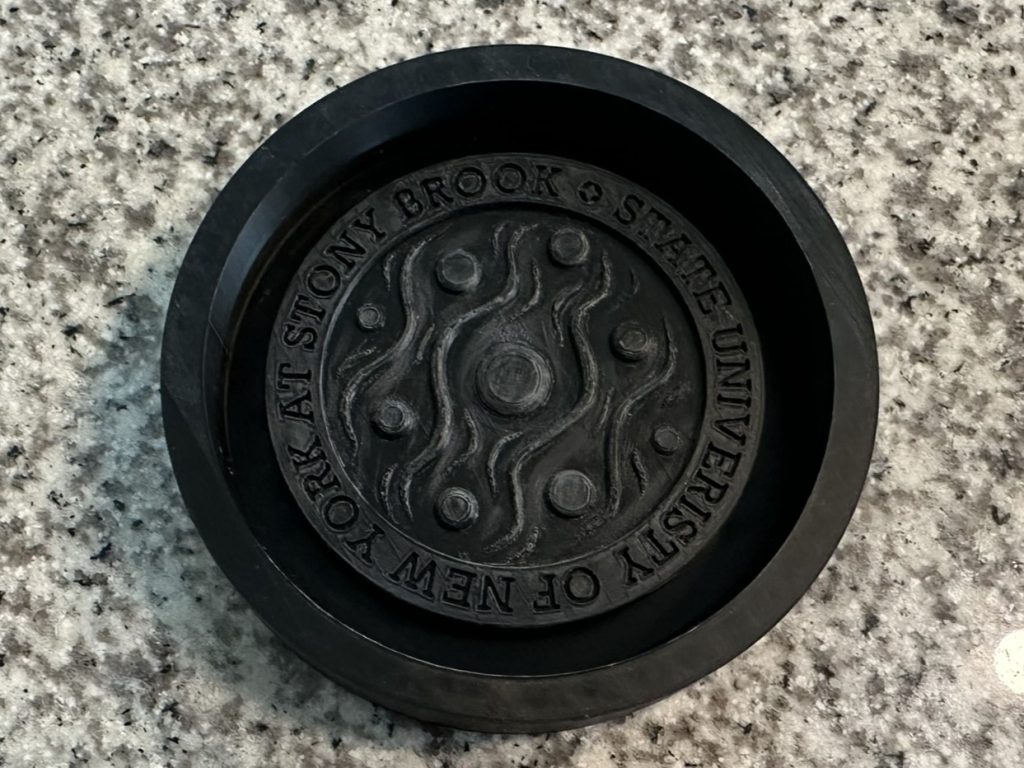
When it comes to 3D printing, two of the more common materials are PLA and resin. As silicone does not react well with resin, that option was off the table. Instead, I went to the local library to print out the 3D print with the smallest layer lines possible. The 3D print came out better than I expected, though I probably should have asked them to fine-tune the settings for the topmost layer (i.e., ironing) in an attempt to limit filament layer lines.
Silicone Molding
Here I will go off on a brief tangent to explain a poorly thought-out attempt to smooth the print. I decided to spray the 3D print with Rust-Oleum 2-in-1 filler-primer; this is a product that is commonly used by hobbyists to reduce mold lines. In doing so, I thought that I would obtain a flawless 3D print. Things were going well, and I even spent a fair bit of time standing until the surfaces were pristine.
However, this is where I ran into trouble. When I went to make a mold of the 3D print using silicone, I found that the mold simply would not harden. As it happens, the filler primer reacts in a negative manner with the silicone material and prevents it from hardening. Alas, that was nearly half the bottle down the drain!
Fortunately, lessons were learned, and the silicone on regular PLA filament worked just fine.
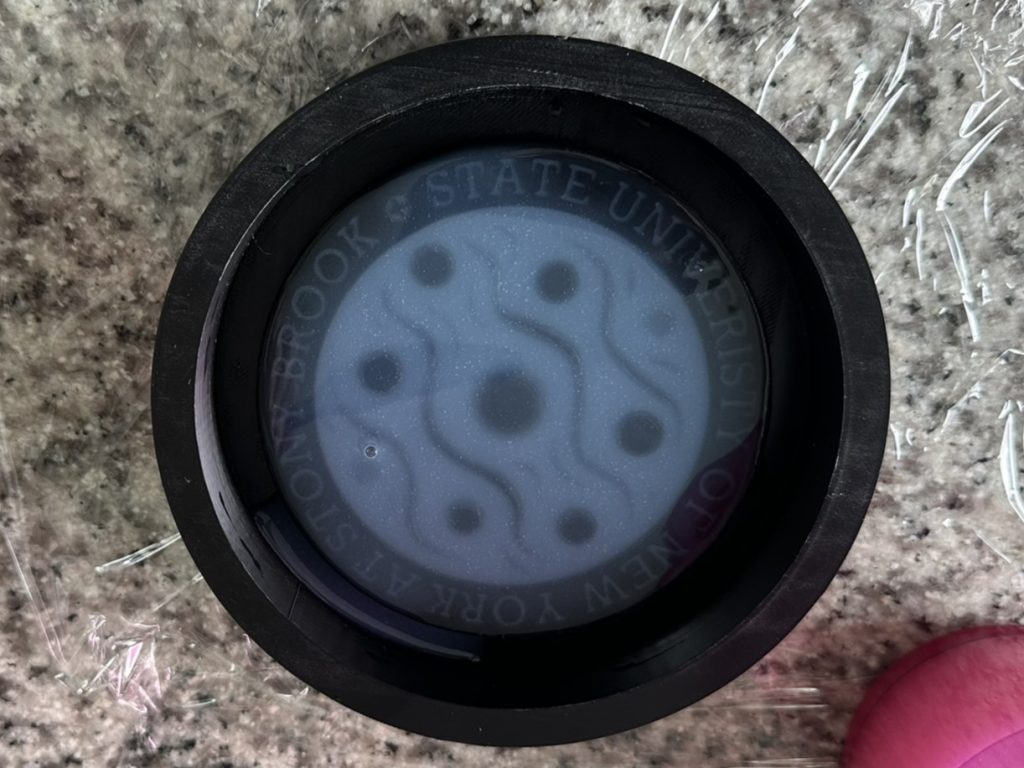
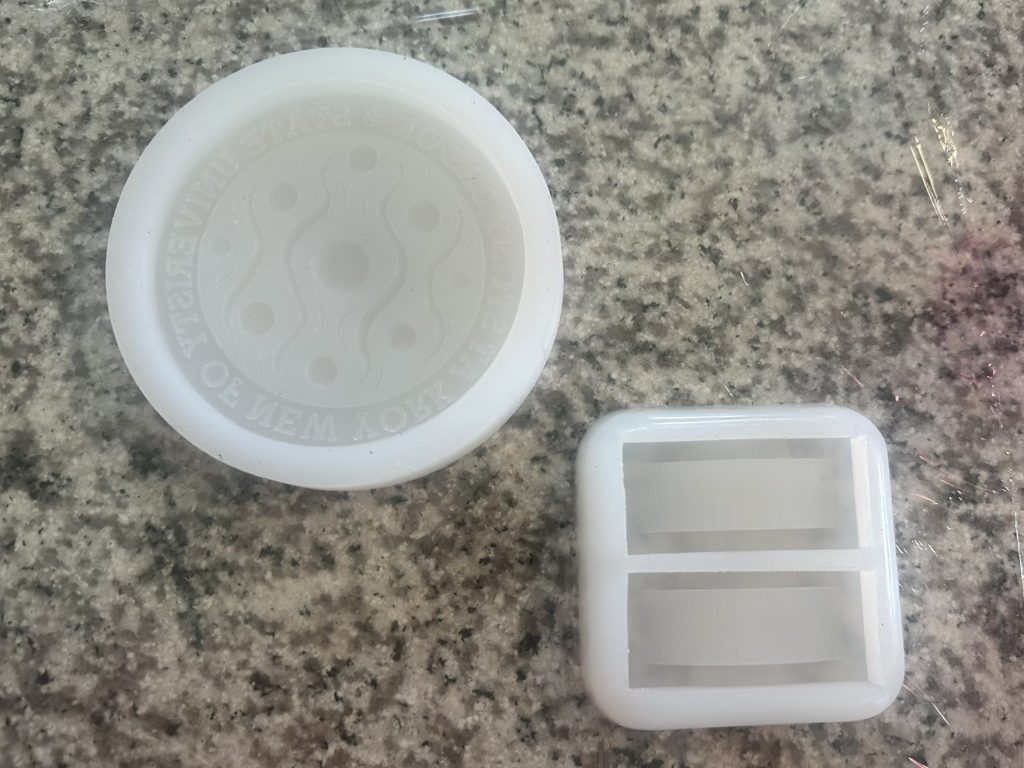
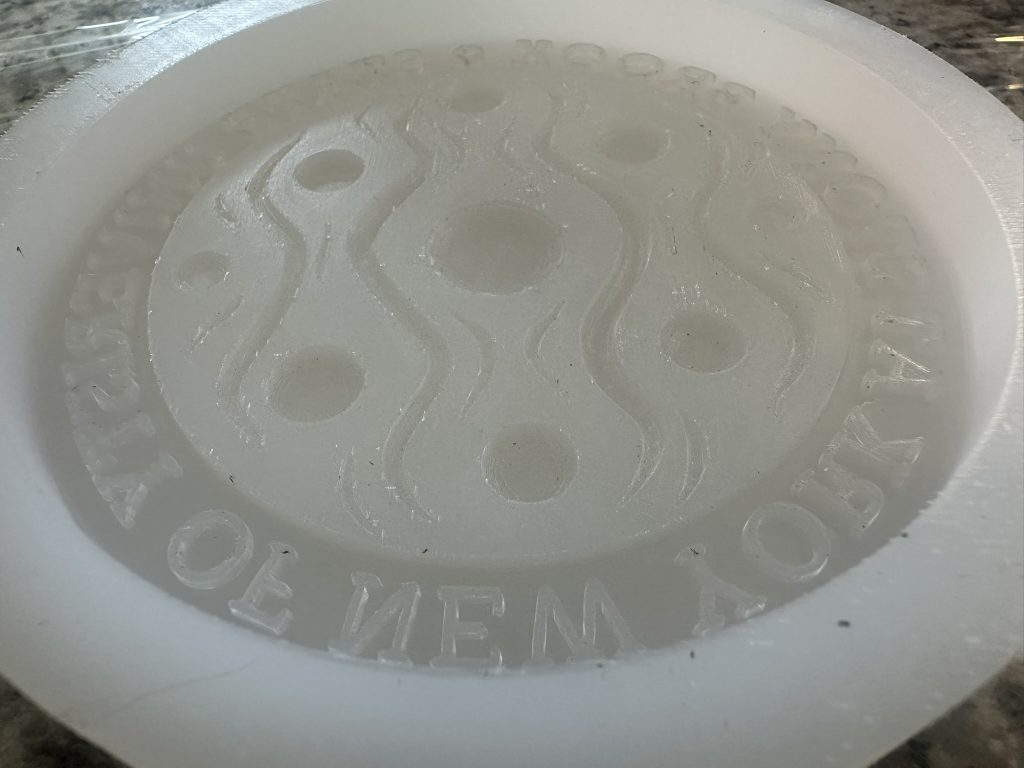
A close-up of the silicone mold itself reveals a high-fidelity capture of the 3D print.
Jesmonite Casting
Jesmonite AC730 micro-concrete uses a two-part 5:1 ratio of mineral base and water-based acrylic. I chose AC730 over the other mixes as it provides the strongest final product and is essentially a concrete composite. I found it helpful to use a kitchen scale to measure each component precisely by weight. Given that AC730 comes out somewhat viscous, the manufacturer recommended adding Super Plasticizer to the mixture.
I used plastic cups, one for the dry and one for the wet mix, pouring the dry into the wet à la baking and mixing with chopsticks until a lump-free, smooth consistency was obtained. Cling wrap was used underneath to limit the mess. Wearing a mask is advised during this process as well, as one shouldn’t inhale the small particulates that are agitated up during mixing.
I then poured the mixture into the silicone mold. A toothpick or another small, pointy object may help break up air bubbles in the small crevices. If there was too much AC730 in the mold, I used a flat scraper (i.e., an old credit card or identification card) to flatten the top. I also used a massage gun to agitate the silicone mold from underneath to further release trapped air bubbles.
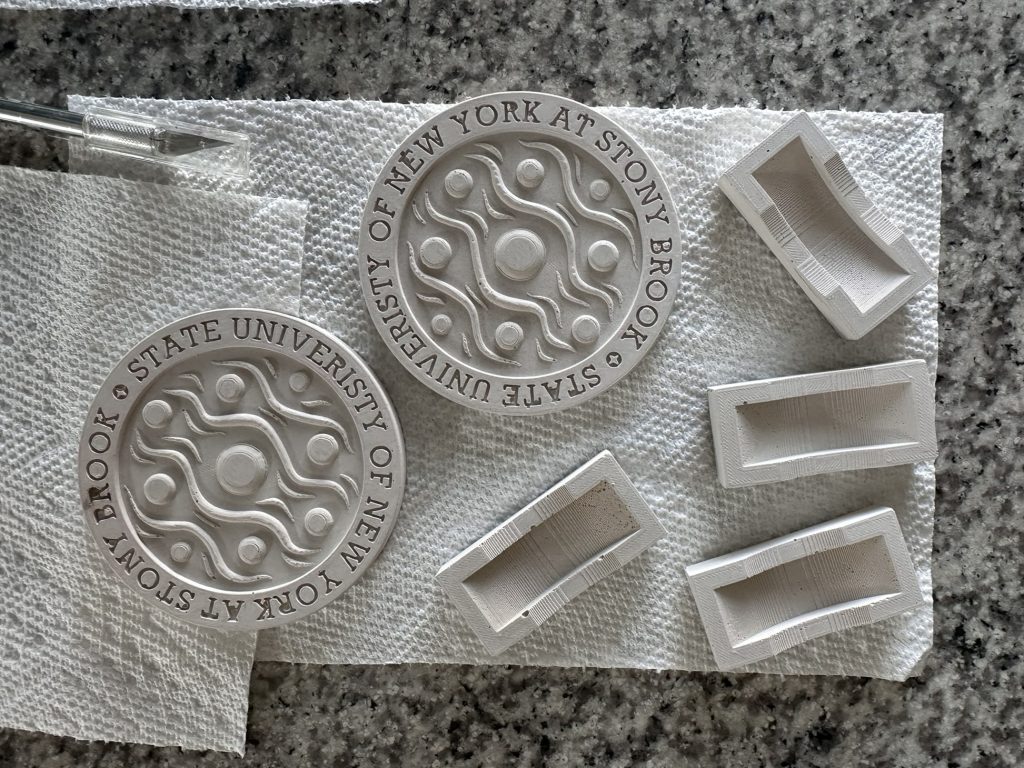
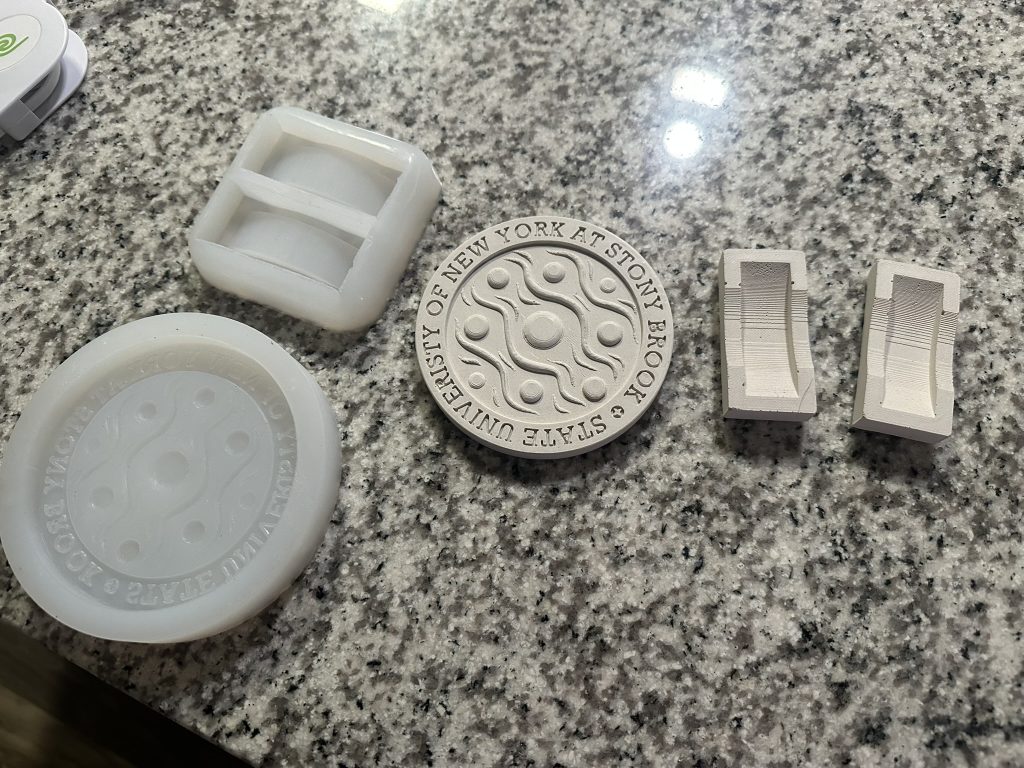
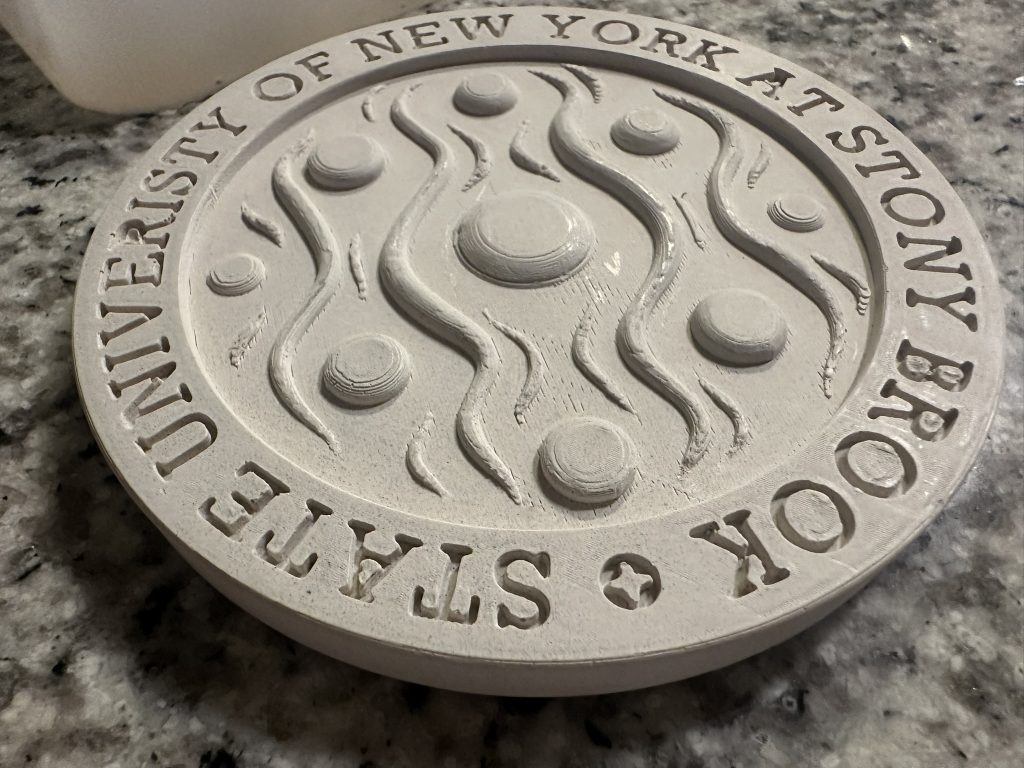
Jesmonite AC730 takes longer to cure than the other formulation. Wait at least overnight or, better yet, 24 hours for curing. Overall, the Jesmonite casts came out excellent. There were small air bubbles here and there, but the text came out largely legible and intact. I used sanding paper to smooth out any distinct 3D print lines on each coaster.
Nevertheless, I wanted to bring out the “stone” aspect of the coasters. One of the main reasons I selected AC730 over the other Jesmonite products was the option to “acid-etch” the surface. After a brief search of techniques online, I settled upon regular white vinegar for the acid etch.
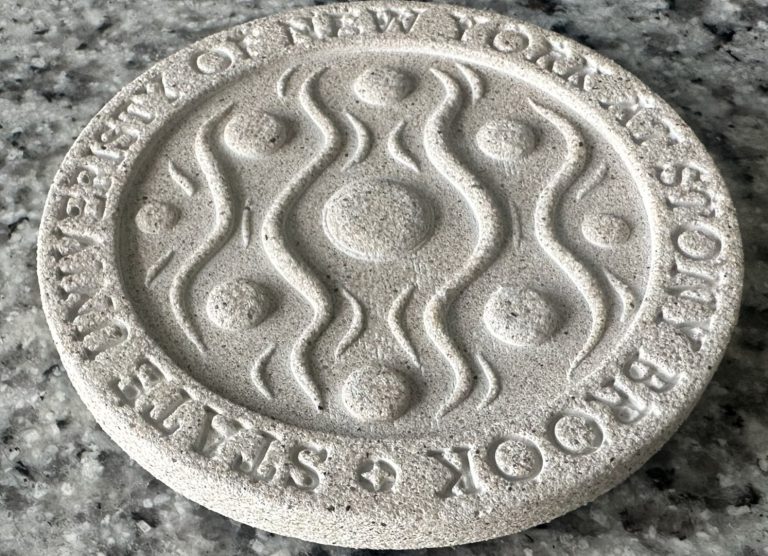
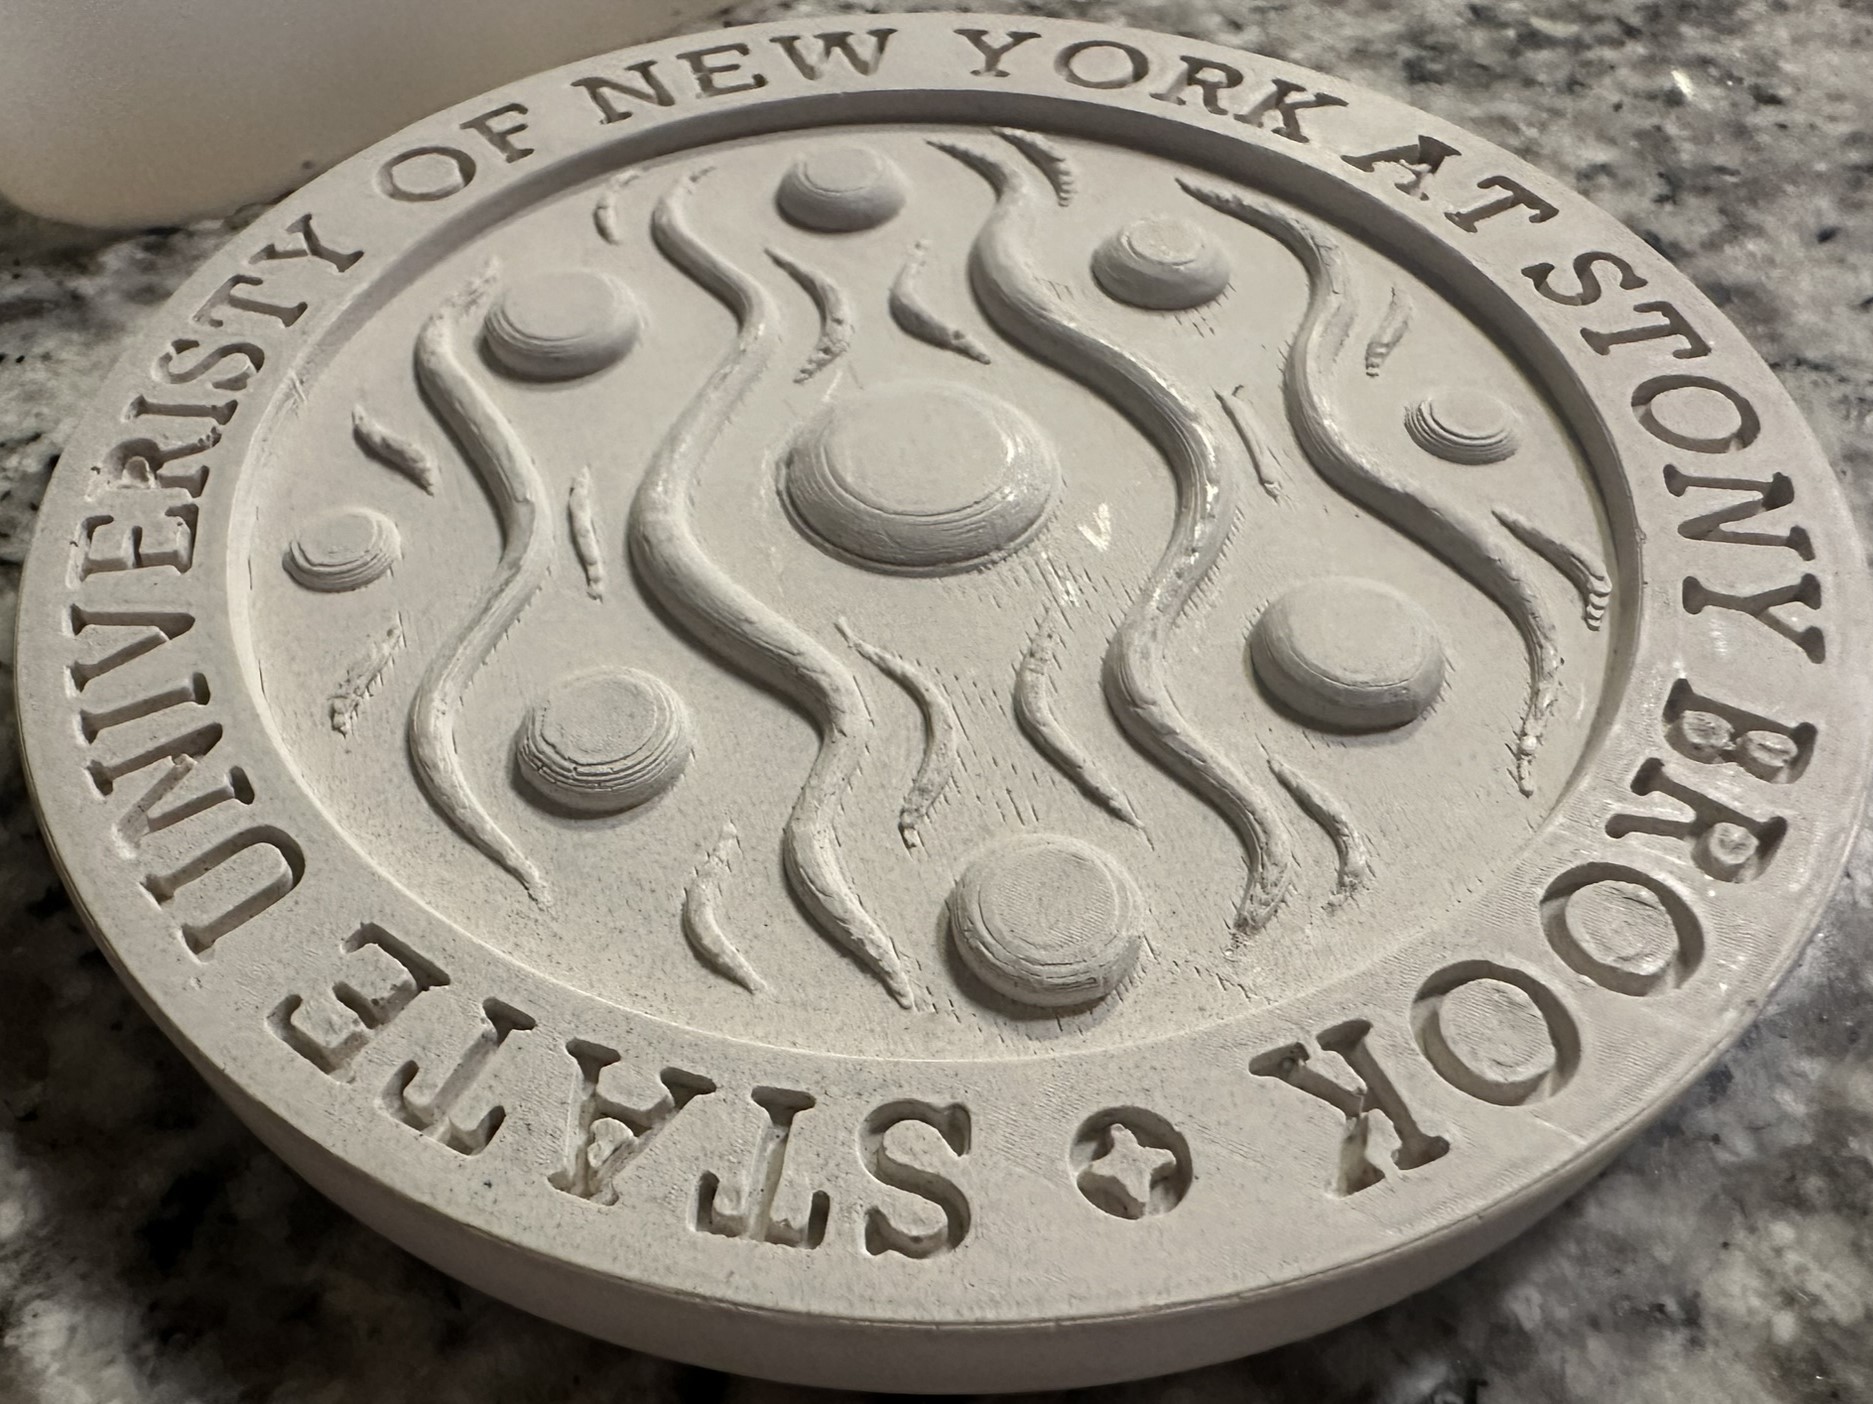
There wasn’t an exact formula for the time setting in the vinegar, but I found that about an hour was the sweet spot. Post-etch, after thorough abrasive cleaning with a toothbrush, any sharp edges on the coaster become blunted, and the natural stone texture comes through. The top-layer filament lines left over from the 3D-printing process are effaced in this process.
Finishing Touches
After the coasters were well-dried, I sprayed them with acrylic matte varnish for extra protection and water resistance.
Most of the coasters I have made are hardwood, finished with a coating of mineral oil/ beeswax. They can be placed upon a typical wood tabletop without issue. These Jesmonite coasters, on the other hand, are now rough-textured and could potentially scratch a tabletop. Therefore, I opted to use the local library’s laser cutter to cut out circular cork to place on the bottom of the coaster. I laser-etched the names of the recipients for added personalization.
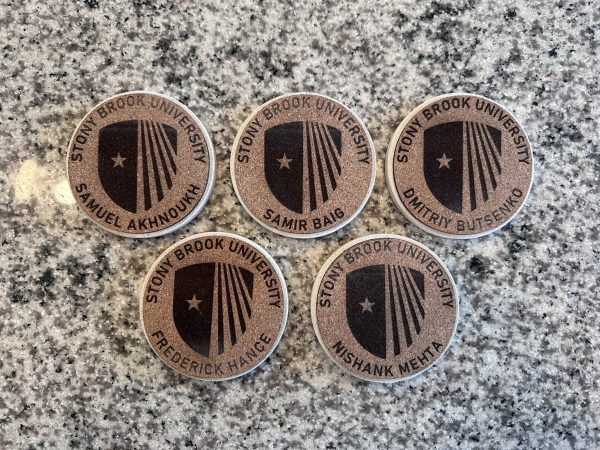
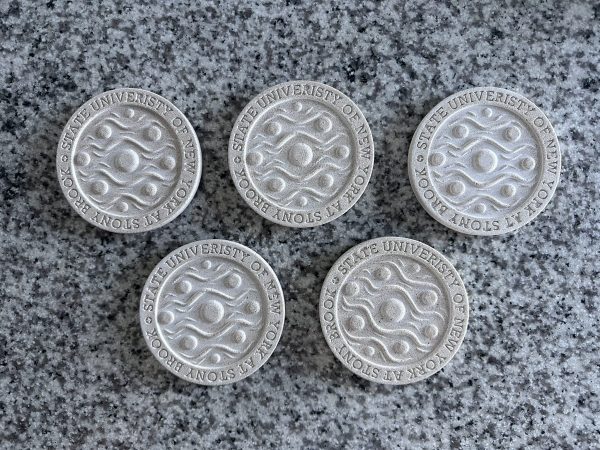
The cork circles came with a peel-away film revealing a sticky surface, which I supplemented with spray tack. I then sprayed a couple more coats of the matte varnish.
The final step was to place a boilerplate congratulations note atop each of the coasters. Of course, to make things more fun, the recipients’ names were handwritten in the penmanship of a nondominant hand, and the notes were randomly placed atop each of the coasters.
Lessons Learned & Improvements
I will admit to being pleasantly surprised by the quality of the finished coasters. The Jesmonite AC730 product has a striking appearance, with revealed bits of minerals after the acid etch. From a functional standpoint, the coasters perform well. Many ceramic mugs are actually indented in the middle and thus rely on the outer rim for support, and the stones provide an adequate surface for stability.
From a project workflow perspective, I was sidetracked by the spray primer, which ruined both a 3D print and a sizeable amount of silicone material. The pragmatic approach would have been to either research compatibility beforehand or test out a small amount.
Aesthetically, I do prefer the acid-etched look, but if I had obtained better casts, then I may have been tempted to forego the vinegar. That being said, AC100, the more common Jesmonite product, is said to be less viscous and may lend itself better to capturing the lettering and other small details without creating air bubbles.
The best part of this project, and any involving molds, for that matter, is that I can easily come back to it in the future. Who knows, perhaps even epoxy could be used in conjunction with AC100 for a dash of color!
Reflection
I was able to revisit this project a couple of months after the initial effort. With the remainder of the Jesmonite I had on hand, I was able to make six more coasters as a personal set.
This time, I paid more attention to the mixing and air bubbles, and I do think these coasters came out slightly sharper. I also increased the diameter of the bottom cork layer for appearance’s sake, and I left it plain and without any etching.
To gauge the precision of my work, I weighed each coaster at the end of the project. Four of the six coasters came out to between 130 and 133 g, with the heaviest at 133 g and the lightest at 123 g. Not too shabby, though room to improve.
Well, that’s all I have for this one – bottom’s up!