
Project Timespan
November 2017 – February 2018 (several iterations)
Inspiration
One of the major appeals of board games, in my opinion, is the variety: from gameplay mechanics to number of players to thematic aesthetics. While I do appreciate a heavy-duty, thematic board game such as Space Hulk or Spirit Island, the unadorned, deceptively “simple” abstract games can be equally as fun.
With access to a laser cutter at university, I had the golden opportunity to make custom sets of board games. In terms of which games can be custom-made, it really depends on the complexity of the components. For example, recreating a game such as Terraforming Mars would be a several-week long process involving 3D-printing, sculpting, laser cutting – at least, that would be my expectation. Therefore, abstract games are the ideal sort of board game to remake.
I went on Board Game Geek, an excellent website all about board games, fittingly, to look through the top abstract games as potential candidates to recreate. The Duke, and its expansion, the Vikings-themed Jarl, caught my eye as the publisher itself offers a freely-available print-to-play version of the game.
Game Overview
Gameplay
Levy. Maneuver. Conquer.
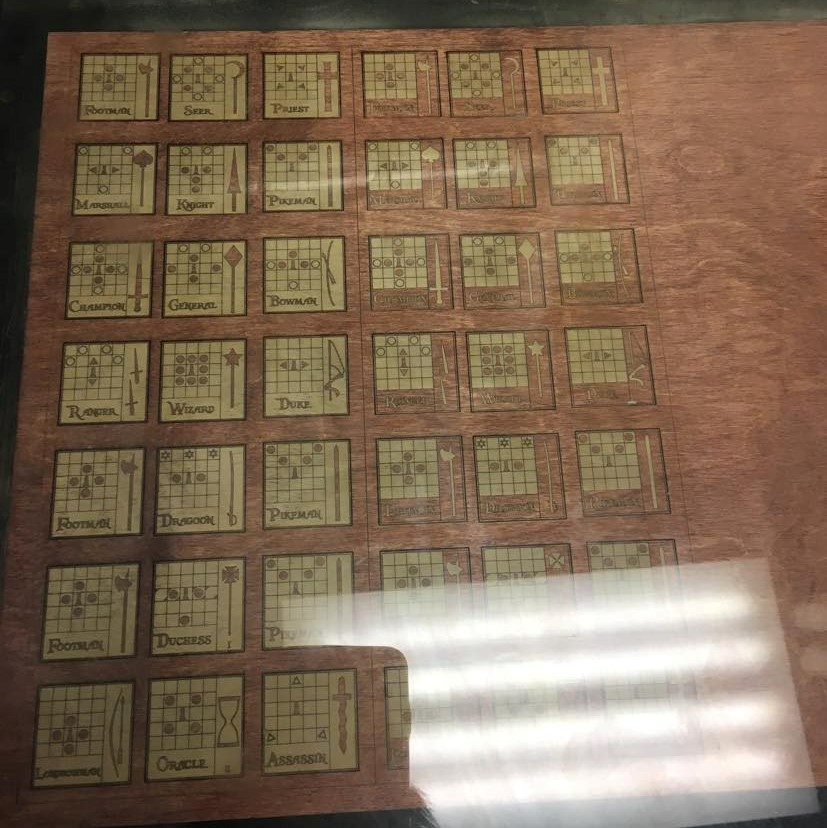
First released in 2013, The Duke has received phrase for its gameplay design. Paraphrasing from The Duke description on Board Game Geek: The Duke incorporates an innovative game mechanism in its double-sided tiles. Each tile represents a difference posture (i.e. offensive or defensive), and has a minigrid demonstrating what the tile can do within a turn. At the end of a move (or the use of a special ability), the tile is flipped over to its new posture.
Full details of the game rules can be found on the designer of the game’s website: Catalyst Games.
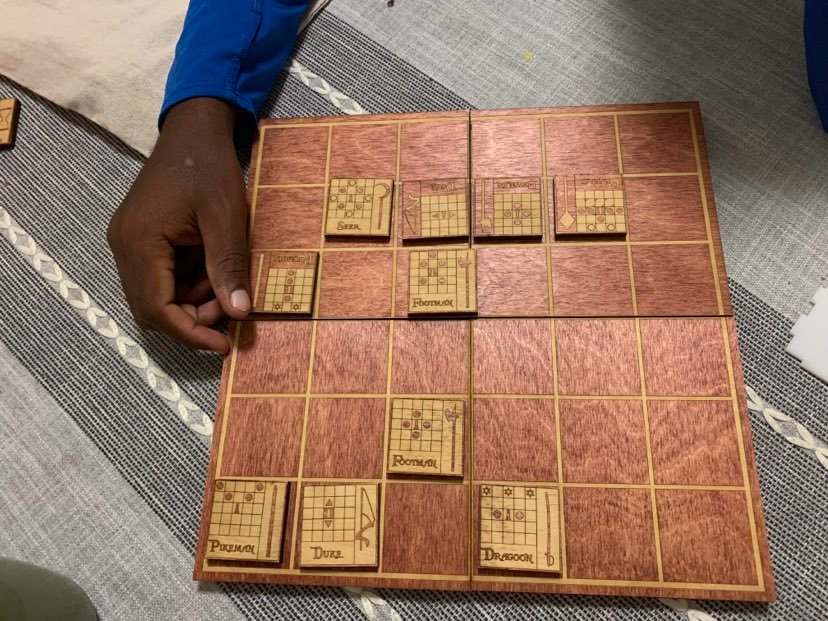
The goal of the game is to capture the opponent’s Duke. The board consists of a 6 x 6 grid, and players start with their Duke and two Footman tiles. Players begin with placing their Duke in one of the two middle squares on their side of the game board along the row closest to them; note that players’ tiles are always oriented with the text right-side up with respect to the player who controls the tile. Then, the players’ two respective Footman tiles are placed edge adjacent to their Duke. Whenever a tile is first placed upon the game board, it is placed with the dark pawn up – this is the starting side of the tile.

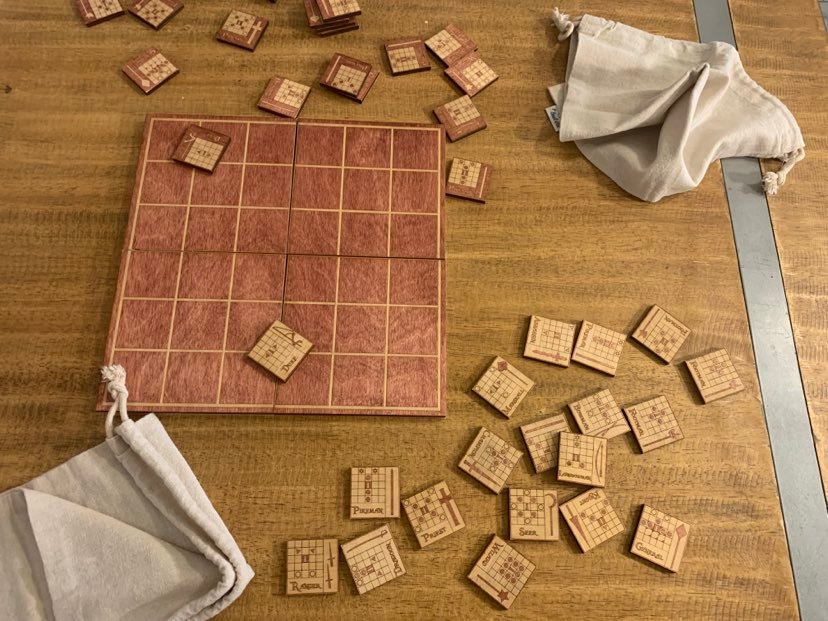
Each turn, a player may choose to either move a single tile or draw a tile from their bag and place it edge adjacent to the Duke. Therefore, there is a limit of four tiles that can be placed next to a player’s Duke. If a player’s movement involves the tile landing on an enemy’s tile, then the enemy’s tile is deemed to be captured and is removed from the board. Don’t forget to flip one’s tile over after moving it!
The learning curve involves figuring out what the movement/attack symbols mean that are located on each tile. There are several options for movement, dependent on a tile’s movement icons. Some of the more common movement icons include regular Move, Jump, Slide, and Jump Slide. The rulebook covers the specifics of these movements in good detail.
Project Overview
Project Design
The timesaving part about this project was that the company that created the game, Catalyst Game labs, offers a free Print & Play version of the game on their website. I was able to use the PDF provided to extract out SVGs of all the tile designs. Therefore, there really wasn’t much at all by way of designing the actual tile pieces, as everything was already accounted for.
Before etching the tiles, I made sure to stain the Baltic birch plywood the desired color (light brown). As the areas are etched away, the top surface of the plywood with the stain will burn off leaving the lighter birch color remaining, creating a nice contrast. All the tiles were cut out from 1/4″ thick (~12 mm) thick plywood. If you note the pieces carefully, I raster etched the grid background for both light and dark tiles, but flipped the foreground/background for the remainder of the tile. This was done as the movement symbols change depending on if the dots are filled in or not.
As the tiles are all double-sided, I chose to make each tile a single piece of wood rather than two pieces glued back to back. Therefore, similar to the process of creating the Carcassonne tiles, I first etched the first side of all the tiles, then cut through the perimeter of the tiles. Afterwards, I flipped these tiles to their backsides for etching the back side.
Project Construction
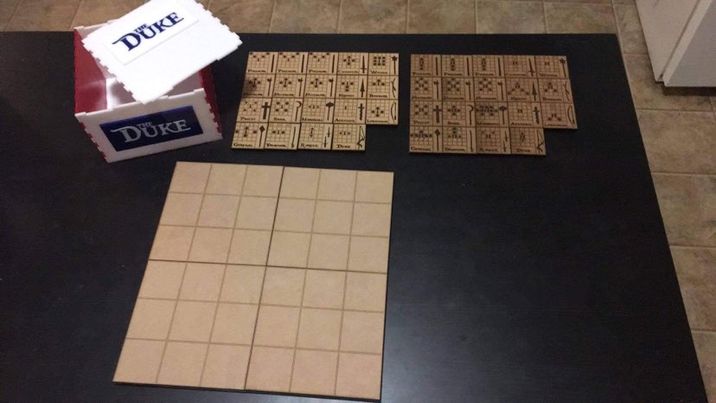
I should note that I first did a test run of the design with 1/4″ MDF to make sure everything worked well. It did! For these MDF pieces, there was insufficient contrast between the etched and unetched regions of the tile. I had to create the contrast myself… using a carefully held permanent marker. The board was created with four quadrants of MDF, but the individual pieces were not held together by any means other than static friction.
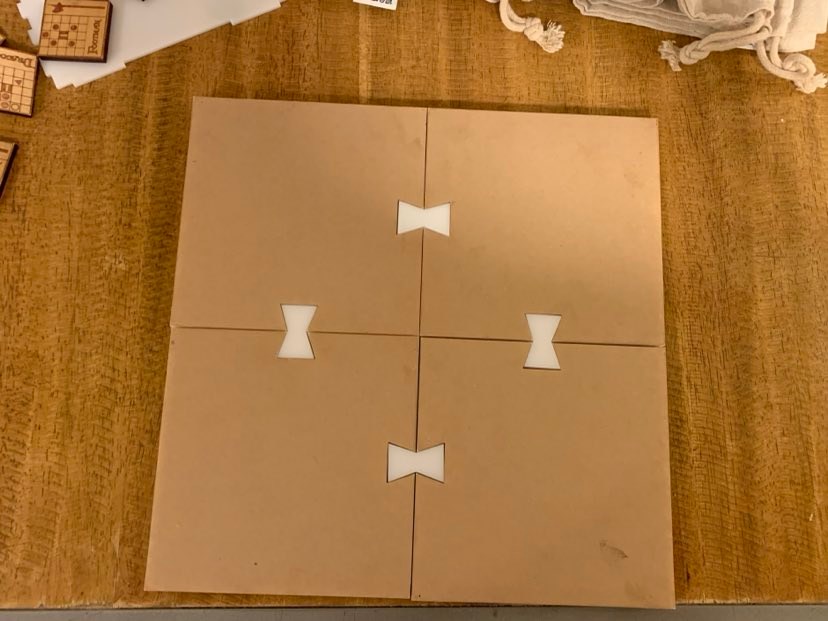
After cutting out and etching the tiles, I then sealed them with a few coats of polyurethane. The next step was to create the board on which the game would be played. I designed a simple board comprised of two layers: the top layer of 1/4″ plywood and the bottom layer of 1/4″ acrylic. I could have used plywood for both layers, but I thought that the frictional grip provided by the paper masking of the acrylic sheet would be helpful while playing the game.
The gameboard consists of four quadrants that are fitted together with the aid of four butterfly joints made from acrylic, hence the requirement of the bottom layer. I found that the four quadrant pieces helped minimize the space of the game for packaging.
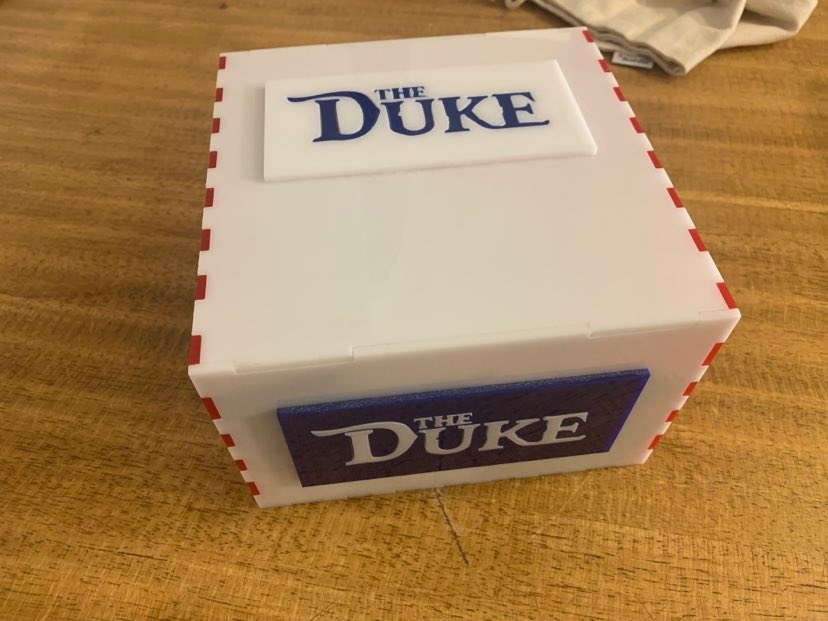
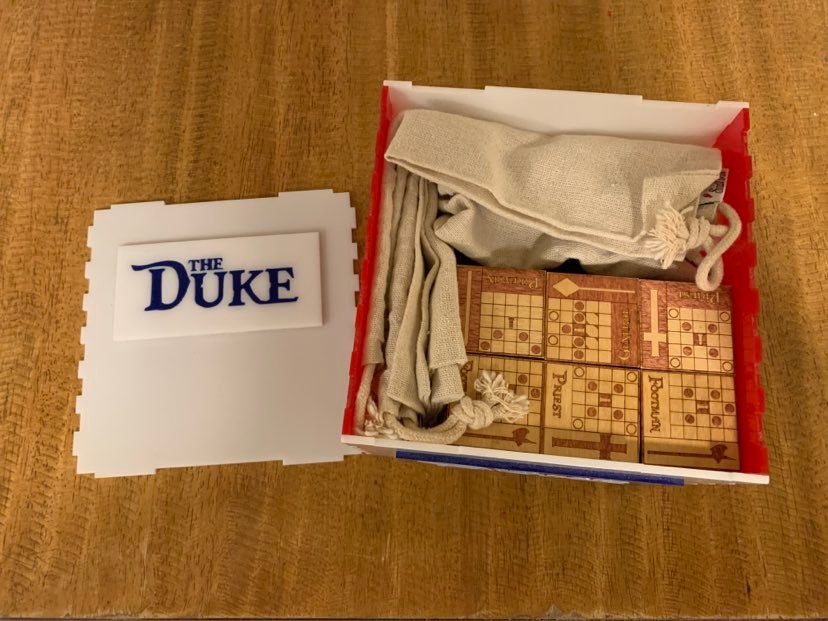
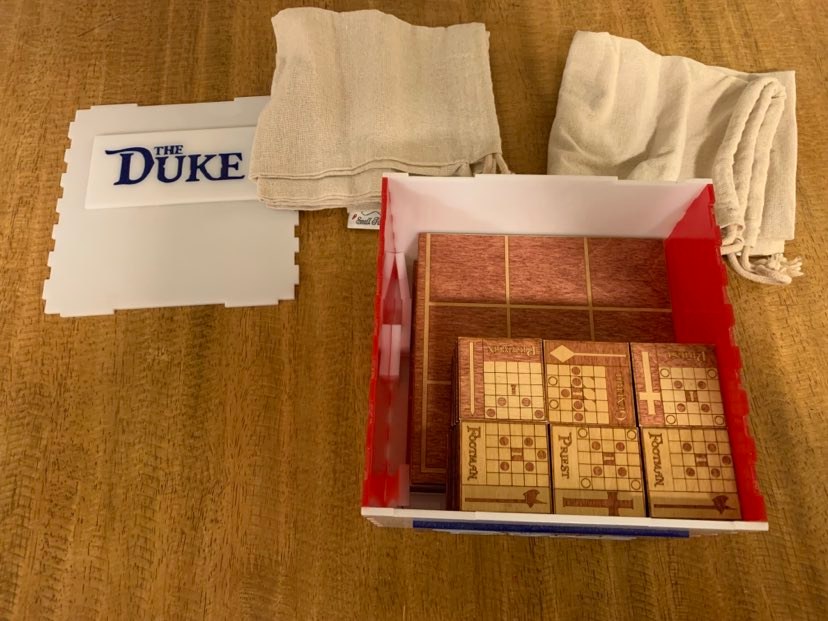
Using the nifty freely available MakerCase tool, I designed a basic box to hold the tiles, board, and bags for the game. The box was constructed entirely out of 1/8″ acrylic, and I added some inlay on the top and front panel to complete the effect. I modified the lid of the box for easier removal (and I think it looks better without mortise and tenon joints along all four edges. The box measures 6.5″ x 6.5″ x 5.25″ – not sure why I settled on those dimensions, but everything packs in quite snuggly.
For another custom version of The Duke, I used a 12″ x 12″ Blick Studio Wood panel for the board instead of four quadrants as in the version above. I also constructed a hinged box out of 1/4″ Baltic birch plywood to hold all the contents. I used MakerCase, yet again, for the box itself. I am having a hard time finding the location online of the files for the box hinges, but they might have been a modified design of this “Laser Cut Hinge” by msraynsford on Thingiverse. I gave away this custom version of The Duke to a friend and neglected to take progress photos, but I did shoot a video of an analogous box I made for Jarl (the difference being I stained the image design and stain color). I only made one custom version of Jarl, whose gameplay I found to be much more slow placed to the extent of borderline-tedium.
Final Results
After the addition of two burlap bags to hold the reinforcement tiles for each player, the game is ready to go!
Lessons Learned & Improvements
Overall, I am really satisfied with the final results of this project. I ended up making, if I remember correctly, four versions of The Duke (two MDF, two plywood) and one plywood version of Jarl. I also made an acrylic box for The Duke, as seen in this post, as well as two hinged plywood boxes, one each for The Duke and Jarl.
There are a couple improvements that do come to mind with regards to redesigning this project:
1. While the tiles are excellent aesthetically, replacing them with solid wood (e.g. maple) might be a nice touch.
2. The sides of the tiles also expose the layers of plywood – I don’t necessarily think that this to be poor in look, a solid wood tile would negate this issue. An alternative solution would be to paint the sides another color, perhaps red or black.
3. The dimensions of the red/white/blue Duke box, while space efficient, do not really stack well with other game boxes which tend to be less cuboid. Perhaps I should have halved the height and doubled the length for the game box.
4. A wooden game board would be a step up in quality as compared with a plywood board – a super neat website – Handmade with Ashley – has a post on this very topic!

Reflection
I have never played a “legitimate” version of the game, but as it is so simple, elegant, and quick and easy to play, there is no excuse to at least print out and play The Duke for yourself!