
Inspiration
It is unbelievably annoying to have to update one’s Secure Sockets Layer (SSL) certification every year. For the last few years, I have bumbled around like a fool in an attempt to jump over all the hurdles to renew the SSL certificate. This year, I decided to make myself a tutorial:
Certified haSSLe
Perhaps it is due to my own lack of experience in technical matters, but Secure Sockets Layer (SSL) certification renewal has been an annual point of headache. SSL is a security protocol that serves to encrypt data sent between a website and a browser. SSL authenticates a website’s identity and helps to prevent hackers from stealing information. An easy way to determine if a website is encrypted is to see if the URL begins with HTTPS (Hypertext Transfer Protocol Secure).
For my personal hobby website, I have been using a third-party SSL service that I ostensibly have secured for 5 years, but for which web browsers such as Google Chrome make me renew every year. Renewal doesn’t sound like a lot on paper, but it has been a yearly source of irritation for me, as the process is not at all streamlined. I get it, encryption requires certain active vigilance that an auto-renewal mechanism may not adequately provide, yet do they have to make things so difficult? Over the past three years, I daresay I have not once been able to figure out the renewal process, even looking through the online Namecheap tutorials (which themselves are a rat’s next of hyperlinks to other tutorials), so I decided to solve the issue once and for all by making a post about the process.
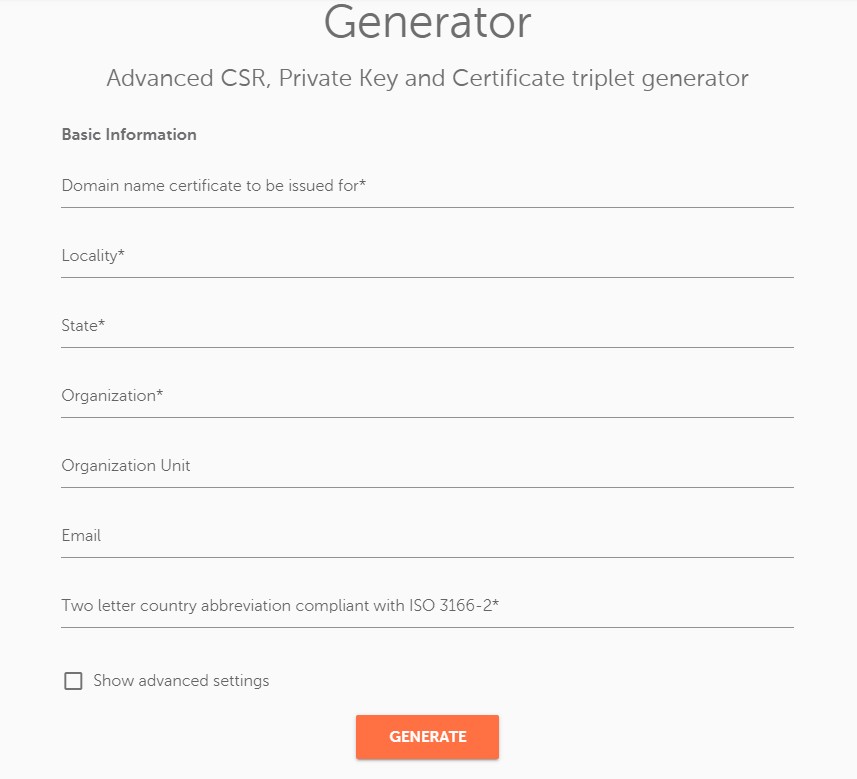
1. Triplet Generator
The first step is to generate a set of three files: “Certificate Signing Request (CSR),“ “Private Key,“ and “Certificate.“ Namecheap offers a way to accomplish this via a CSR Generator.
One has to input basic information including the domain name, locality, state, and as well as two-letter country abbreviation (US). After clicking the “Generation“ button, one will receive three long strings to save, consisting of the CSR, Private key, and Certificate. These should all be save in a Notepad file for later use.
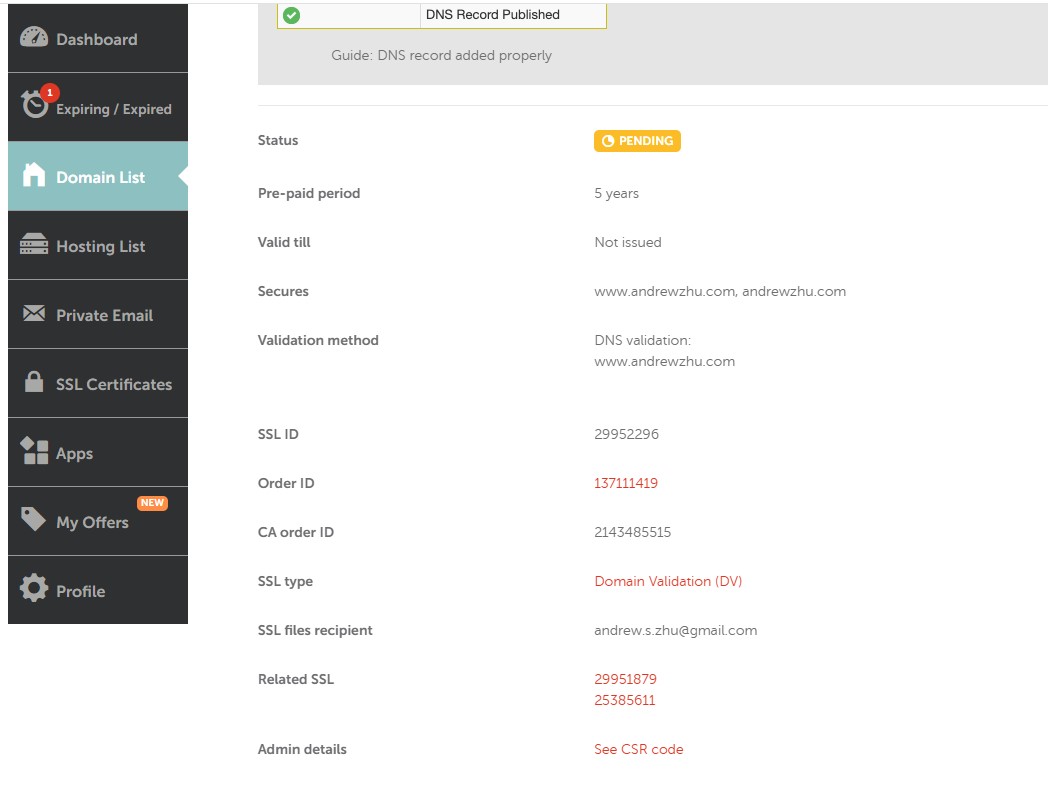
2. Reissue Certificate
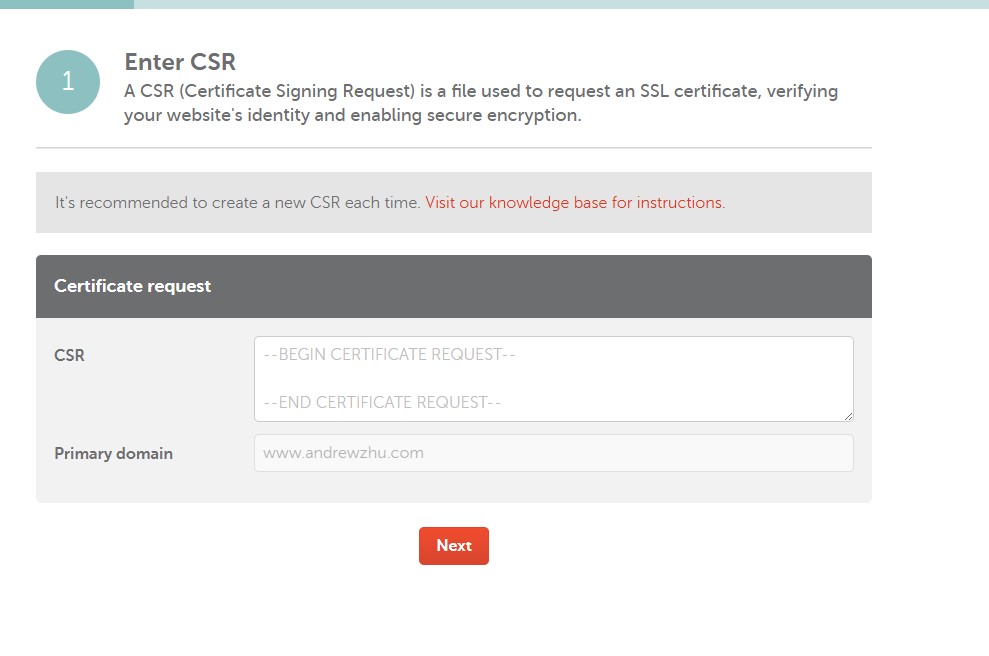
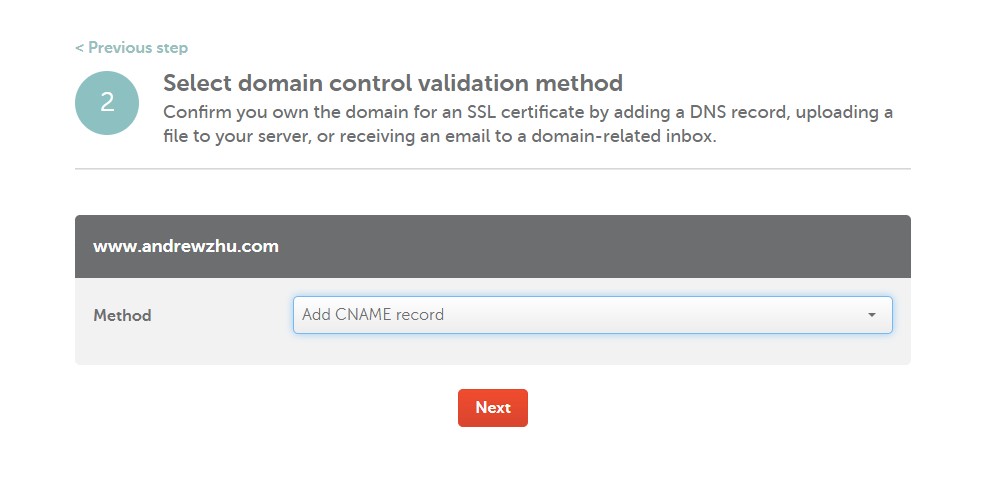
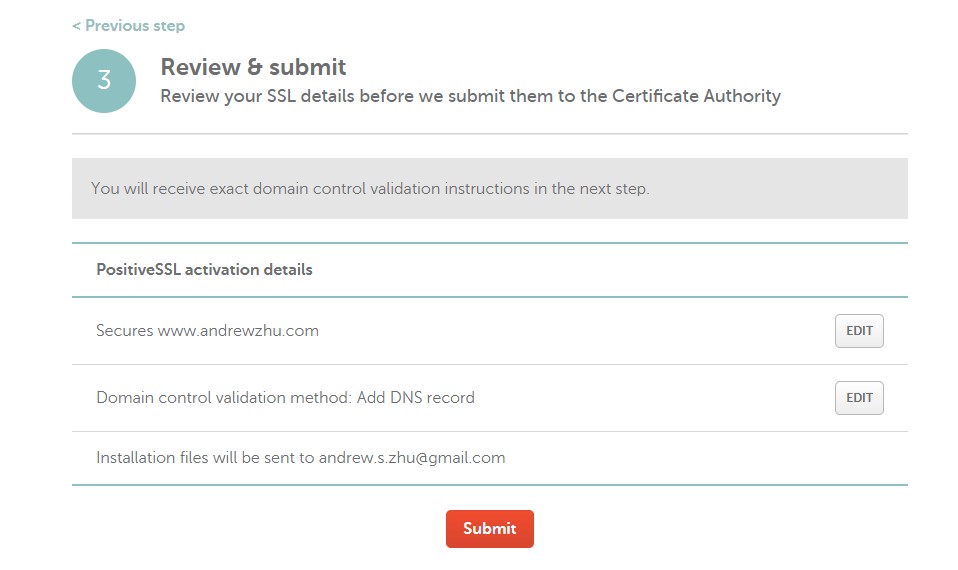
Next up comes the reissuing of the security certificate itself. This requires navigation to Namecheap > Domain List, then Resissue. Selection of “Reissue“ will then prompt a popup indicating that the old certificate will no longer be valid.
By Reissuing the Certificate, one needs to then paste the CSR from Step 1, use “Add CNAME record“ for the domain control validation method, and then “Review & Submit.”
3. Domain Name System
Now that the Certificate Signing Request has been reissued, the next step is to make sure the request is sent through the DNS or “phonebook of the internet,” whatever that means.
This involves going to “Domain List” and selecting “See CSR Code,” which then leads to a page with a dropdown called “Get Record” from “Edit Methods.”
The resultant popup shows the “Domain(s) to Validate)” as well as the “Host” and “Target.”

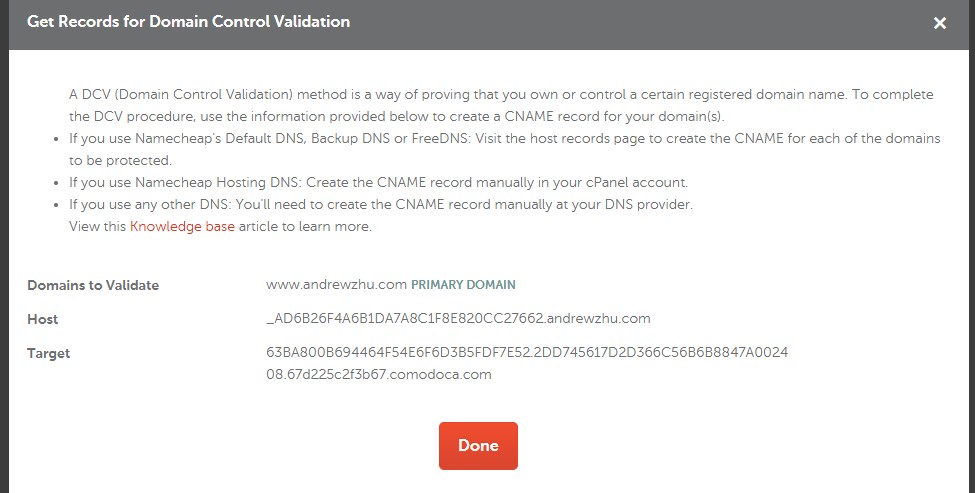
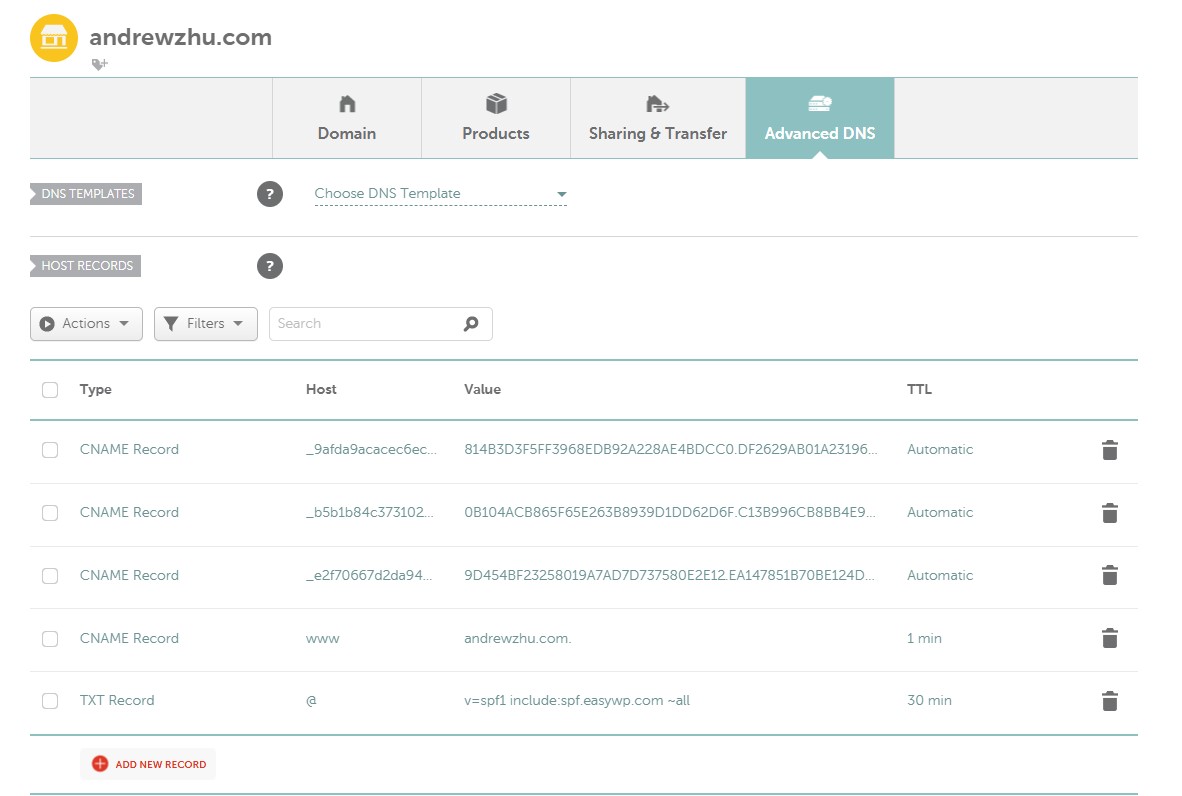
Next, navigate back to “Domain List” and select the domain of interest, then “Advanced DNS.” For “Type,” select “CNAME Record.” For “Host” input the entire Host string before the URL of the website, and for “Value” input entire Value string. “TTL” can be set as “Automatic.”
One has to be super careful not to delete the DNS with Host of “@” or “www,” or else one’s website will crash!
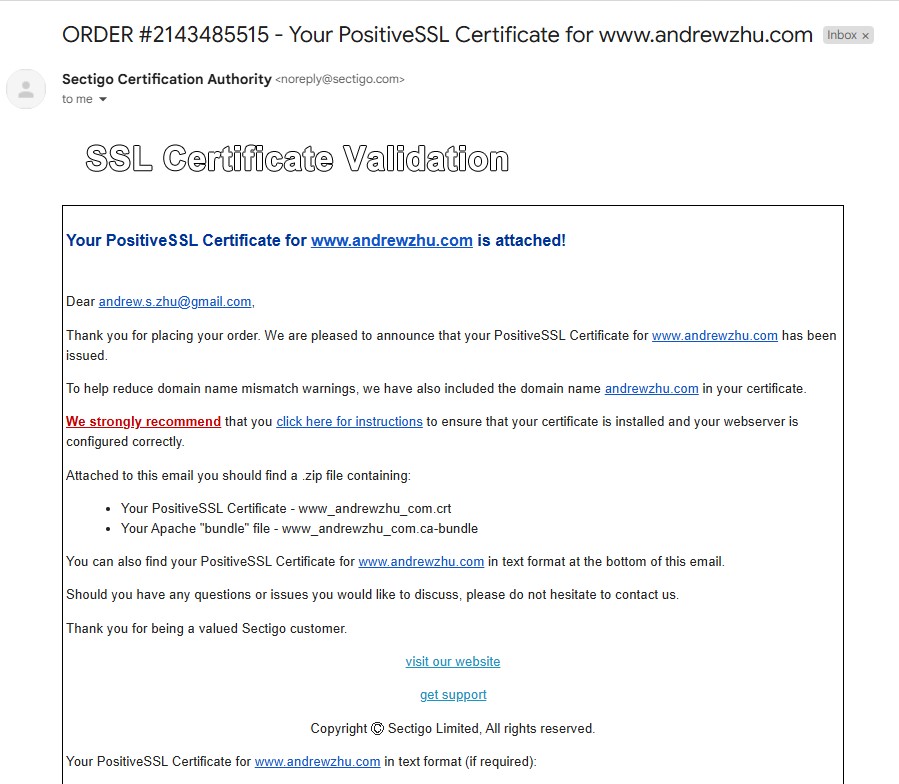
4. Download New Certificate
Momentarily, the new SSL Certificate will be release, and one should have received an email with the new “CA Bundle” and “Certificate” files.
There will be three files needed – the “Private Key” from the initial process as well as the CA Bundle and Certificate files just downloaded.
5. Upload SSL Files
Finally, navigate to the website hosting platform (in my case, EasyWP. Under the “Custom SSL Cert” option, there will be a place to paste the contents for “Private Key,” “SSL Certificate,” and “CA Bundle.”
If one gets three green checkmarks, then good to go! Good for another year, whooo!

Reflection
In my eagerness to set up the new DNS, I carelessly deleted two crucial DNSes that essentially shut down this website, and the next 45 minutes were an anxiety-filled affair as I hopped on Live Chat with Namecheap’s support team to get everything resolved. Thank you, Bohdan T. – five stars, and you won’t have to deal with my silliness again (at least not relating to this issue).
In doing some background reading (i.e. looking on Wikipedia), I found that SSL certification is deprecated, as a more robust cryptographic protocol called Transport Layer Security (TLS) has taken over as the better way to secure HTTPS. Does that mean this meta-tutorial is defunct – I hope not!