
Project Timespan
A couple days in April 2021
Inspiration
The Adventures of Tintin has been my favorite comic book series ever since I first came across it as a young kid browsing through the shelves in my local public library. As such, over the years, I have completed several Tintin-themed projects, including one of a set of Tintin busts that I posted previously.
When I moved into my current apartment, I wanted to create a doorbell cover to complement my Tintin-themed doormat. My next-door neighbor has a fluffy poodle that reminded me of Snowy, Tintin’s wire fox terrier, so I immediately knew what I wanted to design for the doorbell cover!
Materials
> Wine crate boards, 3/8″ thickness: I obtained the wood from a wine crate on the street, discarded by the local liquor store
> Acrylic paint, white and black: inexpensive paints from Apple Barrel
> Wood glue: any type of wood glue will do
> Command strips: for placement of the doorbell cover onto the door
> CNC router: carved using my hobbyist 3018 Genmitsu
Project Overview
I had a few pieces of wine crate boards left over from my previous doorbell cover project. Wine crates are typically constructed of softwood – pine, fir, or spruce – that is easy to work with and paint. As I had already made a doorbell cover, I was well-prepared to tackle this project, and it only took two days to from project design to placing it on my door.
1. Designing the Doorbell Cover

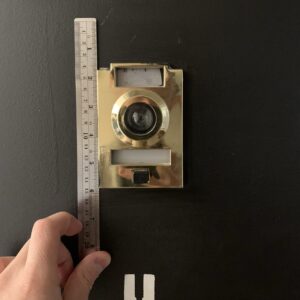
My apartment complex has several types of doorbells, and the one on my door had a peephole in the middle with the ringer on the bottom.
I took careful measurements all relevant dimensions of the doorbell, including length, width, and depth of the doorbell itself as well as the dimensions of the peephole and ringer.
My first doorbell cover design, that of the Weill Cornell logo, lacked the functionality to use the peephole. I felt that this was a significant design error, and I wanted to remedy it this time around. Therefore, I needed a design of Snowy with which I could accommodate the peephole.
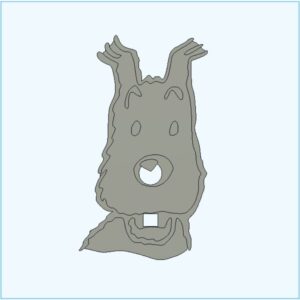
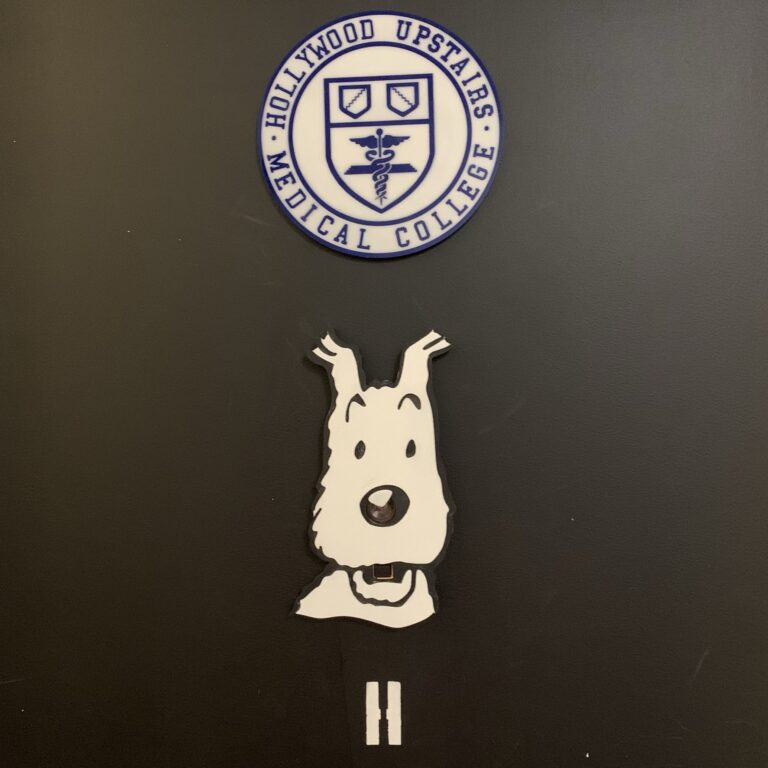
I found a simple image depicting Snowy from the front, and I centered the doorbell peephole as Snowy’s nose; given that Snowy’s nose is black, the glass peephole cover blends in nicely.
For the doorbell button, I scaled Snowy’s face such that the button would fall within the black outline of Snowy’s mouth, such that it fit well within the design.

The wine crate wood was 3/8″ inch thick, and I needed to glue together a few layers to account for the depth of the doorbell itself, which was around 1/2″ in depth.
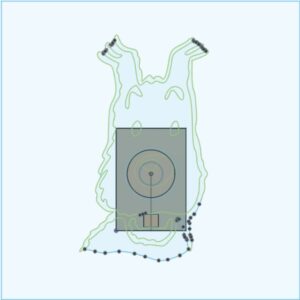
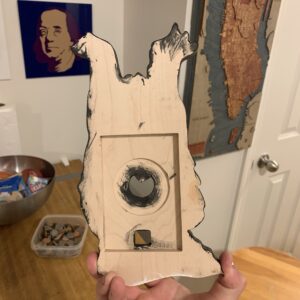
Bottom layer: this layer consisted of a blank silhouette of Snowy with a rectangular portion excised (corresponding with the outline of the doorbell).
Top layer: this layer covers the doorbell itself, and one can see clearly that there are blank cutouts corresponding to the nose (peephole) and mouth (button). Snowy’s nose is actually much larger in area than the peephole, but he also has a characteristic white accent spot on his nose that obscures a small portion of the view.
When I designed the top layer in Fusion360, I made the black outlines recessed to save considerably on cutting time.
2. Machining the Doorbell Cover
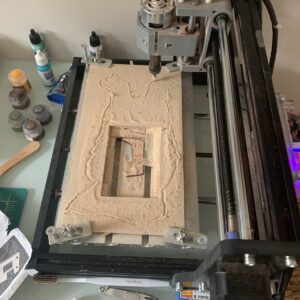
Machining was done by exporting the relevant .grbl scripts from Fusion360 into the included Candle software. I used the 3 mm end mill to route the border for both layers, and smaller diameter end mills for the detailed portions of the design (eyebrows). There was a small mix-up during the machining process as I accidentally routed away the nose accent piece, so I had to separately machine out a nose accent from leftover 1/4″ scrap wood. Not a big deal.
During the design process, I noticed that the depth of a single layer (3/8″) was less than that of the doorbell (~1/2″). Therefore, I decided to flip over the top layer and recess the portions corresponding to the doorbell and the peephole, which itself was stood proud of the doorbell.
In hindsight, I don’t think this step was actually necessary, as I used Command Strips to attach the bottom layer to the door, and the extra depth provided by the Command Strips made up the difference in depth of the doorbell versus the depth of the wood.
3. Finishing the Doorbell Cover
I used regular acrylic paints to finish the doorbell cover. A few coats were needed for adequate paint coverage. I do not recall the exact steps for painting, but the optimal method would be to first paint the black areas (outline, eyebrows, eyes, nose, mouth), then sand off any excess mess before painting the white fur of Snowy.
Afterwards, I used a liberal amount of wood glue to glue together the two layers. I also glued the shiny white piece of the nose down as well.
Command strips were used to attach the completed doorbell cover to the door. The doorbell actually works, as seen in the video!
Lessons Learned & Improvements
The best designs are functional, and there were two main issues that I had with my Weill Cornell doorbell cover design. For one, the peephole was rendered completely non-functional. Second, the bell itself was harder to operate with the addition of the doorbell cover. In this design, I was able to incorporate the doorbell peephole fully, and I opted to simply matters by hiding the button within the design itself.
There are two alternative design considerations I have with this doorbell cover:
The first change is very specific: the white nose accent represents light bouncing off from Snowy’s nose, though from this design it may be misconstrued as part of his fur! Perhaps painting this piece with glossy paint would make a small, but noticeable difference – actually functioning to catch and reflect the light!
The second change would be to find to incorporate the button into the design via a pressable piece. This may be done by altering the image of Snowy selected; the obvious pressable piece would be Snowy’s lower jaw. I considered this when I designed the project, though opted not to continue down this path due to time and complexity issues.
Reflection
Doorbell covers are such fun projects to design and create. In the time since completing this project and posting it to my website, I have completed yet another doggy-dog doorbell cover, this time using my 3D printer. Stay tuned for another doorbell post!